前序
突然想起来之前旧博客的《Windows下搭建ReactNative开发环境(Android)》留下的一个坑,遂填一下坑。而且集成ReactNative到现有Android项目也不是什么容易的事情,网上很多教程都是不完整,你会发现跟着来做都是一步一个坑,不断搜索error解决花了半天才能搭建好,下次再做又是一堆问题,所以我这里记录下自己的集成心得。
准备操作
首先你建议你先看看上一篇搭建环境的文章,否则接下来的内容你可以看不懂或者没有对应的工具。然后就是你需要有一个现有的Android项目,如果你需要创建全新项目前一篇已经描述过了,本文就不再重复了。
本文集成的ReactNative版本为0.44,如果不是的话可能与本文内容有所差异,请自行甄别。
安装ReactNative到项目
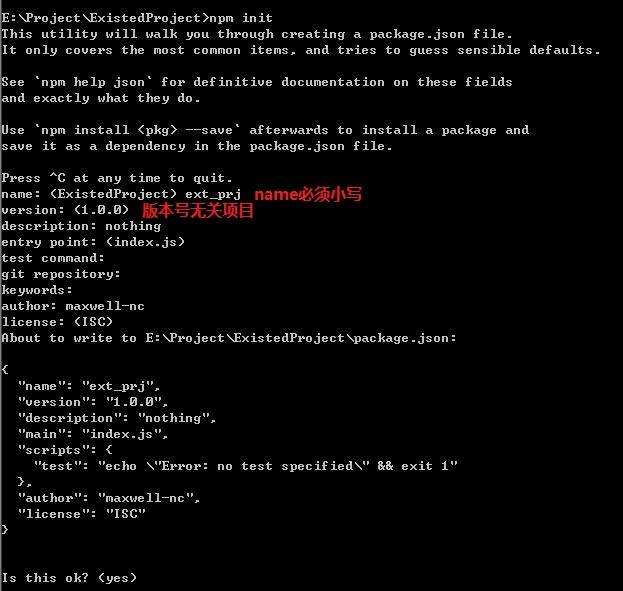
我们已一个已存在的工程ExistedProject为例,首先打开项目的目录,在CMD输入:
npm init
npm init会提示引导你创建package.json,如下图所示:
 创建成功后可以安装React、ReactNative到目录里面,继续在当前目录下输入命令:
npm install --save react react-native
等待安装成功的过程中,可以到https://raw.githubusercontent.com/facebook/react-native/master/.flowconfig下载.flowconfig文件复制到项目之中。(这个文件只是用来约束Javascript代码,也可以跳过),很快就安装完成了:
 这里需要有一个警告:
react-native@0.44.0 requires a peer of react@16.0.0-alpha.6 but none was installed
很多的文章都没有说明这个,导致后面项目运行后会出错。遇到这个问题是因为ReactNative和React的版本有着严格的对应关系,如果不一样就会报错,解决方法就是重新安装对应的React版本,输入命令:
npm install --save react@16.0.0-alpha.6
这样就可以避免后面出现的这两个问题:
Unable to resolve module `react/lib/ReactDebugCurrentFrame`
Unable to resolve module `react/lib/ReactComponentWithPureRenderMixin`
接下来修改package.json文件,在"scripts"下增加一句"start": "node node_modules/react-native/local-cli/cli.js start",注意json格式,需要添加逗号,最后package.json文件应该是这样的:
{
  "name": "ext_prj",
  "version": "1.0.0",
  "description": "nothing",
  "main": "index.js",
  "scripts": {
    "start": "node node_modules/react-native/local-cli/cli.js start",
    "test": "echo \"Error: no test specified\" && exit 1"
  },
  "author": "maxwell-nc",
  "license": "ISC",
  "dependencies": {
    "react": "^16.0.0-alpha.6",
    "react-native": "^0.44.0"
  }
}
创建安卓首页js文件
接下来在项目目录中创建index.android.js文件,然后编辑内容:
import React, { Component } from 'react';
import { AppRegistry, Text } from 'react-native';

class HelloWorld extends Component {
  render() {
    return (
      <Text>Hello world!</Text>
    );
  }
}

//这里的'HelloWorld'是后面android项目使用的
//而后面的HelloWorld是class的名称
AppRegistry.registerComponent('HelloWorld', () => HelloWorld);
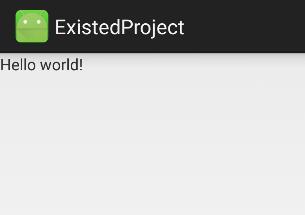
留意注释里面的内容,后面有用到,这个文件是react页面的启动页。基本的框架已经搭建好,下面我们配置android项目的设置。
配置Android项目
首先在android项目目录下的build.gradle文件添加依赖Maven仓库,代码如下:
allprojects {
    repositories {
        maven {
            url "$rootDir/node_modules/react-native/android"
        }
        jcenter()
    }
}
这里又要注意了,node_modules目录的位置必须正确,否则Gradle就会报错误了。然后修改app目录下的build.gradle文件,添加ReactNative依赖:
dependencies {
    //...
    compile "com.facebook.react:react-native:+"
}
为了防止64位库问题和findbugsbug版本问题,同时增加下面的代码:
android {
    //...
    defaultConfig {
        //...
        ndk{
            abiFilters "armeabi-v7a","armeabi-v7a","x86"
        }
    }
    //...
    configurations.all {
        resolutionStrategy.force 'com.google.code.findbugs:jsr305:3.0.0'
    }
}
如果没有设置,后面可能会产生如下类似问题:
Error:Conflict with dependency 'com.google.code.findbugs:jsr305'
java.lang.UnsatisfiedLinkError: could find DSO to load: libreactnativejni.so
java.lang.UnsatisfiedLinkError: dlopen failed: "xxx/libgnustl_shared.so" is 32-bit instead of 64-bit
配置完Gradle之后执行以下Sync操作确保上述操作无误,然后给AndroidManifest.xml文件添加上网路权限,和DevSettingsActivity界面配置:
<uses-permission android:name="android.permission.INTERNET" />

<activity android:name="com.facebook.react.devsupport.DevSettingsActivity" />
DevSettingsActivity这个界面在Release的时候可以去掉,仅仅用于开发测试设置。
Andorid调用ReactNative
首先需要创建一个基类,方便后面使用,这里给大家写了一个BaseReactActivity:
/**
 * ReactNativeActivity基类
 */
public abstract class BaseReactActivity extends Activity implements DefaultHardwareBackBtnHandler {

    protected ReactRootView mReactRootView;
    private ReactInstanceManager mReactInstanceManager;

    @Override
    protected void onCreate(@Nullable Bundle savedInstanceState) {
        super.onCreate(savedInstanceState);
        mReactInstanceManager = ReactInstanceManager.builder()
                .setApplication(getApplication())
                .setBundleAssetName("index.android.bundle")
                .setJSMainModuleName("index.android")
                .addPackage(new MainReactPackage())
                .setUseDeveloperSupport(BuildConfig.DEBUG)
                .setInitialLifecycleState(LifecycleState.RESUMED)
                .build();
    }

    /**
     * 加载ReactNative内容
     */
    protected void loadReact() {
        //这里的HelloWorld必须对应“index.android.js”中的“AppRegistry.registerComponent()”的第一个参数
        mReactRootView.startReactApplication(mReactInstanceManager, "HelloWorld", null);
    }

    @Override
    public void invokeDefaultOnBackPressed() {
        super.onBackPressed();
    }

    @Override
    protected void onPause() {
        super.onPause();

        if (mReactInstanceManager != null) {
            mReactInstanceManager.onHostPause(this);
        }
    }

    @Override
    protected void onResume() {
        super.onResume();

        if (mReactInstanceManager != null) {
            mReactInstanceManager.onHostResume(this, this);
        }
    }

    @Override
    protected void onDestroy() {
        super.onDestroy();

        if (mReactInstanceManager != null) {
            mReactInstanceManager.onHostDestroy(this);
        }
    }

    @Override
    public void onBackPressed() {
        if (mReactInstanceManager != null) {
            mReactInstanceManager.onBackPressed();
        } else {
            super.onBackPressed();
        }
    }
}
注意代码中startReactApplication方法中的参数要与前面index.android.js文件中设置的一样(看注释),然后根据官方的文档,这个ReactInstanceManager可以设置成一个单例,全局使用同一个ReactInstanceManager就可以了,这里为了方便快捷就写在一起了。这个类主要传递了声明周期给ReactNative,也处理了后退按钮事件。
注意上面的类中BuildConfig的导包是选择自己的包名,而不是其他:
import com.github.maxwell.nc.existedproject.BuildConfig;
下面需要把使用到ReactNative的Activity继承这个Activity,如果需要这个ContentView使用ReactRootView,可以在onCreate中添加:
setContentView(mReactRootView = new ReactRootView(this));
如果是在布局中增加了ReactRootView,可以使用:
setContentView(R.layout.activity_main);
mReactRootView = (ReactRootView) findViewById(R.id.rrv_content);
然后可以调用loadReact();去加载ReactNative内容。
Android打包
前面的操作完成后就基本完成了,现在需要打包一份离线JSBundle进去App,用于没网的时候App展示使用。
首先在项目app/src/main下面必须要创建一个assets目录,否则后面生成会报ENOENT: no such file or directory, open 'E:\Project\ExistedProject\app\src\main\assets\index.android.bundle'。
然后在项目目录下打开CMD,输入:
react-native bundle --platform android --dev false --entry-file index.android.js --bundle-output app/src/main/assets/index.android.bundle --assets-dest app/src/main/res/
看到Done writing bundle output就证明生成成功了。接下来直接运行App到手机上看看效果,成功看到离线内容。
启动服务器
上面的查看效果是离线JSBundle的效果,如果你尝试reload的话就会发现出现error,因为连接不上服务器。直接在目录下输入:
npm start
启动服务器后不要关闭CMD,手机App注意设置Debug server host & port为主机的地址(具体可以参考我的上一篇博文),然后reload,看到App绿色的进度条或者服务器CMD中build的进度条就知道正在构建。成功后就可以看到服务器端的js效果。
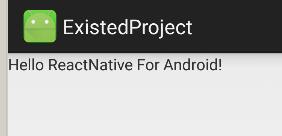
可以尝试修改提示语为“Hello ReactNative For Android!”并且保存,手机端reload既可以看到app端更新了的效果:
注意你修改了资源可以不重新打包离线JSBundle进去,但是至少需要一份离线JSBundle才能运行App,否则Gradle编译无法通过。
远程调试
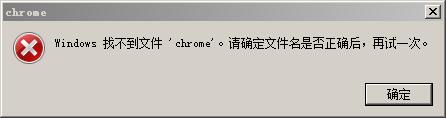
如果你选在手机选择“Debug JS Remotely”,如果你没有安装chrome浏览器,不出意外就是npm服务器提示:
 然后手机端也红屏提示错误,实际上你只需要用任一款chrome壳浏览器打开http://localhost:8081/debugger-ui然后重新reload,看到
Status: Debugger session #0 active.就可以连上远程调试了,调试不是本文的内容就不再阐述了。
尾声
ReactNative集成的过程中有很多的坑,如果你按照我的博文来操作可能你会说:“不会啊,一路流程非常轻松没问题啊”,但实际上本博文只是把可能的遇到问题和处理地方已经提前说明了。其中遇到的错误本文也列出来了,方便后面遇到的朋友也参考学习下。
相关文章
Windows下搭建ReactNative开发环境(Android):http://blog.csdn.net/maxwell_nc/article/details/60960864
原创文章,欢迎转载,请保留出处。有任何错误、疑问或者建议,欢迎指出。
请注明文章出自于:https://maxwell-nc.github.io/android/rnIntergation.html